
Installing and activating the Exindium Before/After Compare plugin is quick and straightforward. Follow the steps below to get started:
Exindium Before/After Compare Documentation
1. Installation
Install from WordPress
- Go to Plugins → Add Plugin in your WordPress dashboard.
- Search for Exindium Before/After Compare.
- Click Install Now, then Activate.
The plugin is now ready to use.
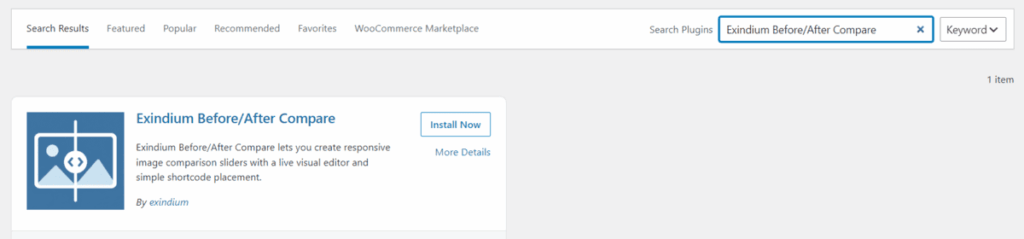
Manual Installation
- Download the plugin ZIP file from the WordPress.org repository.
- Go to Plugins → Add Plugin → Upload Plugin.
- Upload the ZIP file and click Install Now.
- Activate the plugin when installation is complete.
2. Creating a Slider
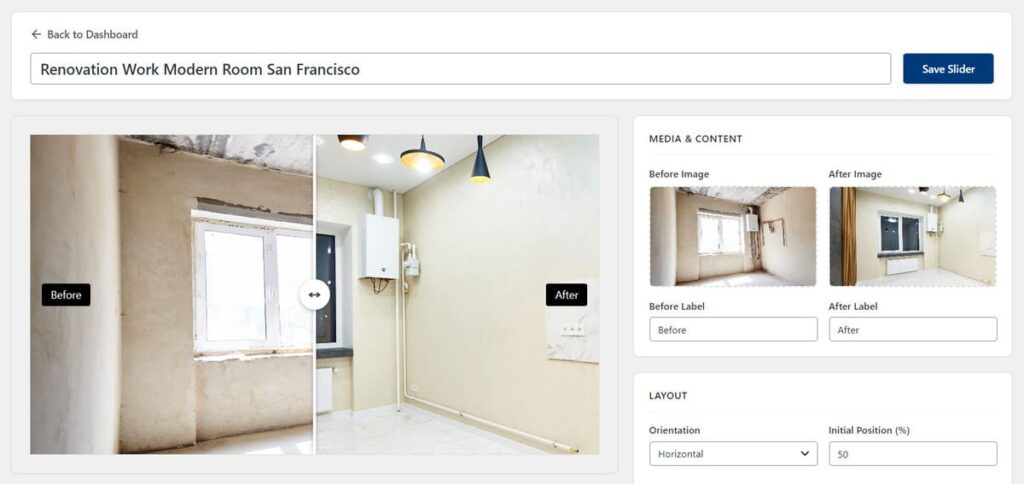
Go to B/A Sliders in your WordPress dashboard and click + Create New Slider.
Add:
- A slider title
- A Before Image
- An After Image
Both images are required before the slider can be saved.
Customize Your Slider
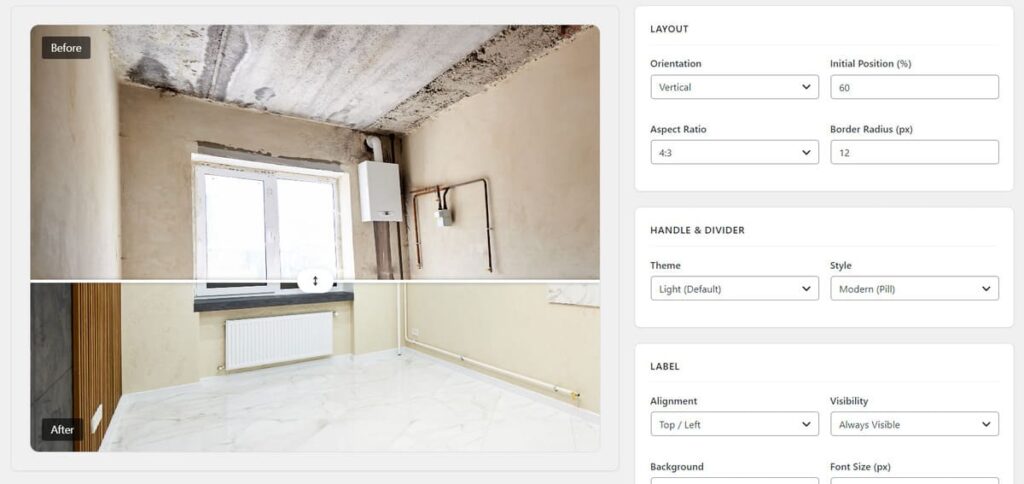
Use the live editor to customize your comparison, including:
- Horizontal or vertical orientation
- Initial handle position
- Aspect ratio
- Border radius
- Light or dark handle theme
- Classic or modern handle style
- Before and After labels
- Label position and visibility
- Label background and font size
Changes are displayed immediately in the live preview.
Note: Dragging the handle inside the preview does not change its saved starting position. Use the Initial Position setting to control where the handle starts on the frontend.
3. Publishing a Slider
After saving your slider, Exindium Before/After Compare generates a shortcode that can be used to display it on your website.

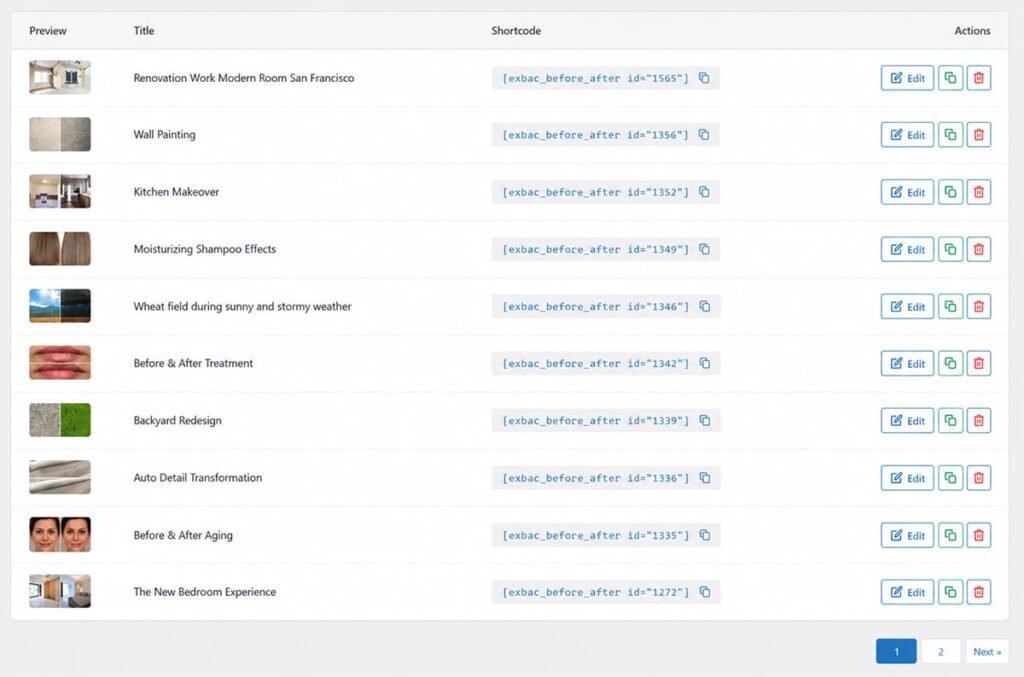
Each slider has its own shortcode, available directly from the slider editor and from the B/A Sliders dashboard.
Example:
[exbac_before_after id="123"]
Click the shortcode to copy, then paste it into any WordPress post, page, widget, shortcode block, or page builder element that supports WordPress shortcodes.
Each shortcode references a specific slider. Changes made to the slider are automatically reflected wherever that shortcode is used.
4. Managing Sliders
The B/A Sliders dashboard provides a central place to manage your existing comparison sliders.
From the dashboard, you can:
- Edit a slider
- Duplicate a slider, including its images and settings
- Delete a slider
- Preview the selected Before and After images
- Copy its shortcode
The dashboard uses pagination when you have multiple sliders, making larger collections easier to browse and manage.
5. Translations
Exindium Before/After Compare supports custom Before and After label translations with WPML and Polylang.
Slider settings such as images, orientation, layout and appearance are shared across languages. Only the custom Before and After labels are translated separately.
WPML
Exindium Before/After Compare registers custom labels with WPML String Translation under:
EXBAC Dynamic Labels
Each slider uses its own strings, such as:
before_label_123
after_label_123
Translate these from WPML → String Translation.
Polylang
Custom Before and After labels are registered automatically with Polylang.
They can be translated from the Polylang Strings translation interface.
6. Plugin Data
Deactivating Exindium Before/After Compare does not remove your sliders or settings.
By default, your plugin data is also preserved if Exindium Before/After Compare is deleted. You can change this behavior at any time from the Settings modal in the B/A Sliders dashboard.
Keep Slider Data
This is the recommended and default option.
Your sliders, settings, images, labels, and shortcode IDs remain stored in WordPress if the plugin is deleted. If you reinstall and activate Exindium Before/After Compare later, your existing sliders become available again and their shortcode IDs remain unchanged.
Delete Data on Uninstall
Choose this option when you want to completely remove Exindium Before/After Compare and its stored data.
If this option is selected and the plugin is deleted, all Exindium Before/After Compare sliders and their associated settings are permanently removed. Deleted Exindium Before/After Compare data cannot be recovered.
7. Developer Guide
By default, access to the B/A Sliders admin area requires the WordPress manage_options capability, which normally restricts access to Administrators.
Developers can change the required capability using the exbac_minimum_capability filter.
Example:
add_filter( ‘exbac_minimum_capability’, function() { return ‘publish_posts’; } );
Add the filter through your child theme’s functions.php, a site-specific functionality plugin, or your preferred code snippets solution.
Only grant slider management access to trusted roles that should be able to create, edit, duplicate and delete sliders.
8. Troubleshooting
Check that:
- The shortcode contains the correct slider ID.
- The slider still exists.
- Both Before and After images are configured.
- The slider has been saved successfully.
Deleting a slider does not automatically remove its shortcode from posts or pages where it was previously added.
You can remove the shortcode manually. If left in place, Exindium Before/After Compare outputs nothing for a deleted or invalid slider ID, so visitors will not see an error.
For WPML, open String Translation and look for the MBAC Dynamic Labels domain.
For Polylang, open the Strings translation interface and confirm that the slider labels are available for translation.
If Delete Data on Uninstall was selected before deleting Exindium Before/After Compare, the plugin permanently removed its slider data.
If Keep Slider Data was selected, reinstalling and activating Exindium Before/After Compare should restore the retained sliders.